
Pocket MP2 Plus uses a middleware server called MP2 Mobile Products Server to send transaction data to MP2. Pocket MP2 Plus clients communicate with the server via a TCP/IP connection. The MP2 Mobile Products Server can be used in conjunction with Barcoding Plus, so only one instance of the MP2 Mobile Products Server is needed. While we recommend that this is installed on the MP2 database server, for reasons that will be outlined later, this can be installed on a workstation. If you do elect to install the MP2 Mobile Products Server on a workstation you will need to assign a static IP to the target workstation.
The mp2 Mobile Products server can be run on Windows XP, Vista, 7, 8, 8.1 or Server 2003, 2008 (R1/R2) and 2012. The server requires very little resources to function, less than 50mb disk space and 1GB RAM.
Click here to download the latest version of MP2 Mobile Products Server
Pocket MP2 Plus Server Installation
- Start the installation by double-clicking MP2 Mobile Products.exe. The installer will extract files and launch setup.bat. Press any key to continue.

-
The installer will ask if you want MP2 Mobile Products Server to start
automatically when the computer starts or manually started by the user. The MP2 Mobile Products Server runs
as a service allowing the application to start and handle client request without needing a user to log in and
start the server. Enter Y for auto start and N for manual start.
-
Enter 2 to install Pocket MP2 Plus. If you plan on using Barcoding Plus and Pocket mp2 Plus now or in the future, enter 3

-
After selecting the components you wish to install, you will be prompted to select your server version. For users with SQL 2012, proceed to the troubleshooting section.

- Next, enter your server instance and instance name. Then followed by a user/pw with appropriate credentials.

- The installer will proceed to run scripts against the DB. If you believe they may have not been run properly please see the Troubleshooting section.
-
Press any key to complete the install.
Creating ODBC (DSN) Connection to MP2 (Pocket MP2 Plus)
The mp2 Mobile Products server uses its own ODBC data source and cannot use the same data source as mp2. Please do not skip this step.
- Open ODBC Data Source Administrator
- 32-bit OS: Start - Control Panel - Administrative Tools - Data Sources (ODBC)
- 64-bit OS: Start - run and enter C:\Windows\SysWOW64\odbcad32.exe
- Select the System DSN tab. Then click Add... button
- Select the SQL Server driver and click Finish
- Enter mp2_mobile in the name field (Description is optional)
-
Enter the mp2 server name an instance in the server field and select Next. Example: (local)\mp2

Your SQL Server instance name may be different or you may be using the default instance, in which case you'll just need to enter (local)
- Select With SQL Server authentication radio button and enter a Login ID and Password of a SQL user that has access to the MP2 database. Click Next.

- Select Change the default database to and select the MP2 database from the list. Click Next.
- Select Change the language of SQL Server system messages to and select English. Click Finish.
- Test the data source, if successful, click OK and exit the tool.
Configuring MP2 Mobile Products Server For Pocket MP2 Plus
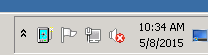
Now that MP2 Mobile products server has been installed, it needs to be configured. After the install has been completed, the program will usually have already started and will show in your Windows Taskbar like below. Our next steps will configure the application, so Pocket Plus can properly connect to it.
Step-by-step guide
If you have Windows UAC is enabled, please run "mp2MobileServiceManager.exe" (C:\Program Files (x86)\MP2 Mobile Products) as administrator.
Also, if the program is already started in the taskbar, stop and close the program, then proceed with the next step.
- Start the application, by either accessing it in the taskbar or running mp2mobileservicemanager.exe.
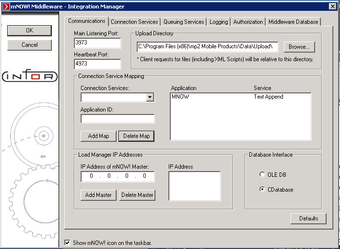
- We now need to add ODBC Real Time connection services, for Pocket MP2 Plus, they are:
- PocketMP2
- PocketMP2RT
- Completed, it should show like below.
") Note: you should have an application called MNOW with a Text Append service.
Note: you should have an application called MNOW with a Text Append service.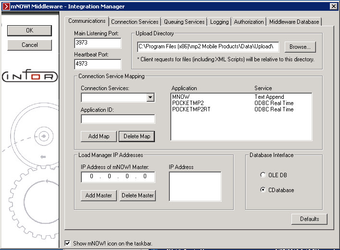
- Next, we need to configure those connection services, to connect to the proper data source. Select the Connection Services tab, then ODBC Real-Time tab.
- Enter the Data Source name that you created earlier and the user name/password for your mp2 database.
- Click the OK button, on the left panel to save your changes. This will prompt you to restart the MP2 Mobile Products Service.
Apply mp2 Database Scripts
- Browse to "C:\Program Files (x86)\MP2 Mobile Products\Scripts\SQLServer"
- Run each .sql file in SQL Management Studio on your MP2 database in order, 0-5.
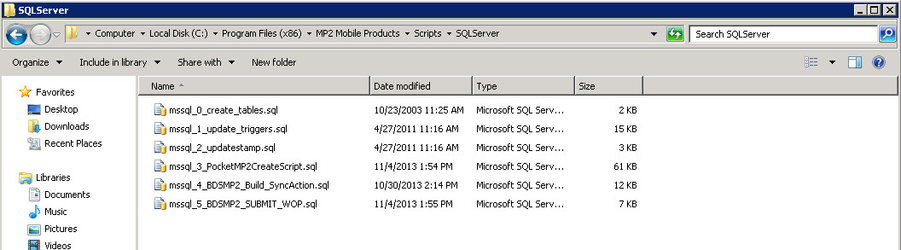
![]() Make sure to select MP2 as your database.
Make sure to select MP2 as your database.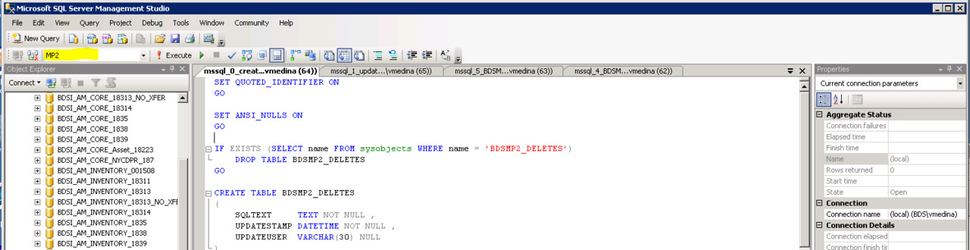
Installing Pocket Plus for Mp2 on your Mobile Device
If your devices were ordered through Infor/Blue Dot Solutions, they will arrive preloaded with Pocket Plus for MP2 application and this section can be skipped. If not, please install mp2 Barcoding Plus as outlined below.
In order to copy the files from the desktop to the mobile device, you’ll have to have Windows Mobile Device Center installed on your PC.
Windows Mobile device Center:
- Windows Vista, 7, 8 & 8.1 64-bit: https://www.microsoft.com/en-us/download/details.aspx?id=3182
- Windows Vista, 7, 8 & 8.1 32-bit: https://www.microsoft.com/en-us/download/details.aspx?id=14
- Windows XP (Active Sync): https://www.microsoft.com/en-us/download/details.aspx?id=15
Once installed, connect the device's cradle to your PC and place the device in the cradle. Windows Mobile Device Center should start and bring you to a connected screen. If it does not, try rebooting your PC. After the reboot is complete, start Windows Mobile Device Center (Start - Programs) and cradle your device.
Only one device can be connected to a PC at a time.
- Open Windows Explorer and go to the Client\Pocket_mp2_Plus subdirectory under the MP2 Mobile Products Server (c:\Program Files\mp2 Mobile Products). Right click on thePocketmp2Plus.CAB file and select “Copy”.

-
Select “My Pocket PC” and in the left panel, right click and choose “Paste”. This will copy the file from the desktop to the mobile device.
Depending on the device and OS, the device may be named differently. However, it will show up as a drive or device in "My Computer"

- After the file has completed copying, open the devices File Explorer from the Programs menu on the Mobile Device, and go to the mobile devices root directory, and click on the mp2BarcodingPlus.CAB file. This will start the installation process.

- Once the installation is completed, you have successfully installed Pocket Plus for MP2 on the mobile device.
Setting Up Pocket MP2 Plus client
![]() The mobile device must have a network connection, either WiFi or USB (Windows Mobile Device Center), during setup.
The mobile device must have a network connection, either WiFi or USB (Windows Mobile Device Center), during setup.
There are two main components of Pocket mp2 Plus, the engine, and the application. The engine is installed on the device, the application is downloaded from the MP2 Mobile Products server on startup.
Engine Config
- Start Pocket mp2 Plus on the device. (Start - Programs)
- Note: The engine version is shown on this screen

- Note: The engine version is shown on this screen
- Select Setup
- Enter '12345' for the admin password
- Select Edit IP Address
- Select any existing IP addresses and click Delete
- Enter the IP address of your MP2 Mobile Products Server and select Add, then select OK

- Port should be 3973
- Synch Every should be 5 Secs.
- Data Directory should be Temp
- Sync Output as should be XML

- Select OK and select Enter on the next screen to start the application.
Initial Admin Sync
Admin Sync - Downloads lookup data like users, RFO/RFF/Solution codes
User Sync - Downloads Work Order data, Equipment, History, Parts, etc.
- On the Login Screen, enter the default Administrator credentials.
- User: ADMIN
- Password: 12345
- Note: the application version is displayed under the password field
- Once logged in, select Synchronize
- Depending on how much data you have in mp2, the sync could take from 2 to 15 minutes to complete. We recommend the device be placed in a cradle, with power, until the sync has completed.
- Once the sync has completed, select Exit to Return to the Login screen.
Users are now able to login with their MP2 username and password, sync and start using the application.
Comments
0 comments
Please sign in to leave a comment.